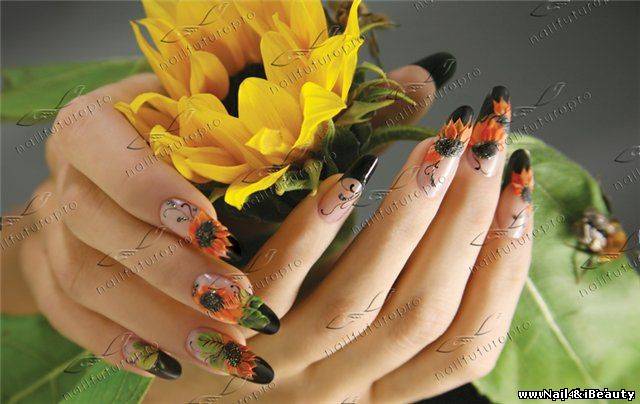
Poinsettia Flower Design

 
Prepare the Natural Nail and wipe over with Nail
Pure Plus.
Apply a Platinum nail form,
remove the centre tab and re-attach it to underside of the form where
the length will be, this will re-inforce the form and make it slightly
stronger. Close the form joining the tabs together making sure that the
form keeps straight to the sidewalls and doesn’t scoop upwards.
Use
a reverse application technique, pick up a bead of Purely Pink Masque pre-mixed with Opal Shimmer and apply it to zone 3. Apply a bead of
the pre-mixed Opal
Shimmer and Totally Clear acrylic to zone 2. Wipe your brush.


Apply a bead of the pre-mixed gold glitter to zone one and pat it out
to create the square free edge of the nail. While the acrylic is
setting you can carefully pinch the nail with the Perry Tweezers to enhance the ‘C’ curve. Wipe your
brush.
Once the nail is set you can start to create your flower. Begin
by picking up a small bead of Raspberry
Red acrylic powder and place it onto the nail create the petals of
the poinsettia pick up another small bead and place it one beads width
away from the first bead. Return to the first bead and with the tip of
the brush towards the centre of the nail press the bead out so the
thinnest part is facing away from the centre of the nail. Shape the bead
to resemble a petal shape and use perry
tweezer to create detail on petals such a the line down the centre.
Add a third bead of acrylic in the gap between the first two beads.
Repeat this procedure adding petals in a circular pattern. The petals
should overlap and create a 3D effect. Wipe your brush.
  
Add further detail to the petals by applying a bead of Basic Black acrylic to the base of the petals and
patting out to add depth and shadow. Wipe your brush.
Allow the petals to set fully, then apply a bead of the pre-mixed
gold glitter acrylic to the centre of the flower. Wipe your brush.
  
You can then begin to add the leaves. These are created by double
dipping your bead. Pick up a small bead of Leaf
Green coloured acrylic then dip this into the basic black. This will give your leaf a darker base.
Apply this to the nail in the place you want the leaf then press it in
and drag out so it thins out. Shape the bead to make it look like a leaf
and add detail using the tweezers. Repeat this procedure to create
another leaf.


Add further detail to the flower by picking up
another bead of Leaf
Green and shape this into a thin stem.
Once you are happy with your design, cover
whole nail with Totally Clear acrylic to encapsulate the design.
Allow the acrylic to set fully then file and shape the nail using a 150
grit Endurance File.
To finish the nail apply Glaze
n’ Go and cure for 90 seconds to give the nails a high gloss shine.
Apply Nurture
Oil to the cuticle area to moisturise.
It is important to remember to keep wiping your brush
throughout this step by step to keep it clean and clear of acrylic
 
| 


